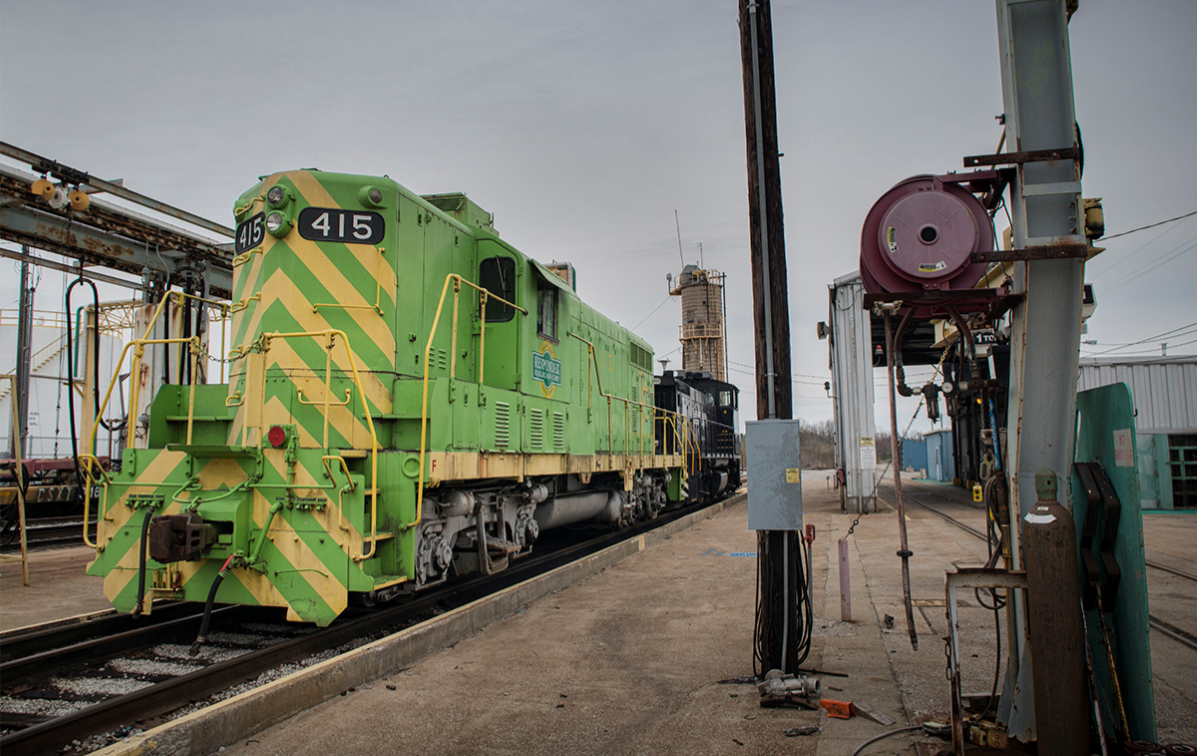
April 6, 2018 – With permission, I was able to get this shot of Respondek Railroad Corporation’s 415 and 2425 sitting in the old engine service facility at CSX’s Atkinson Yard in Madisonville, Ky on the Henderson Subdivision. Last word I got was that these two units are going to be servicing industry in the Henderson, Ky area.
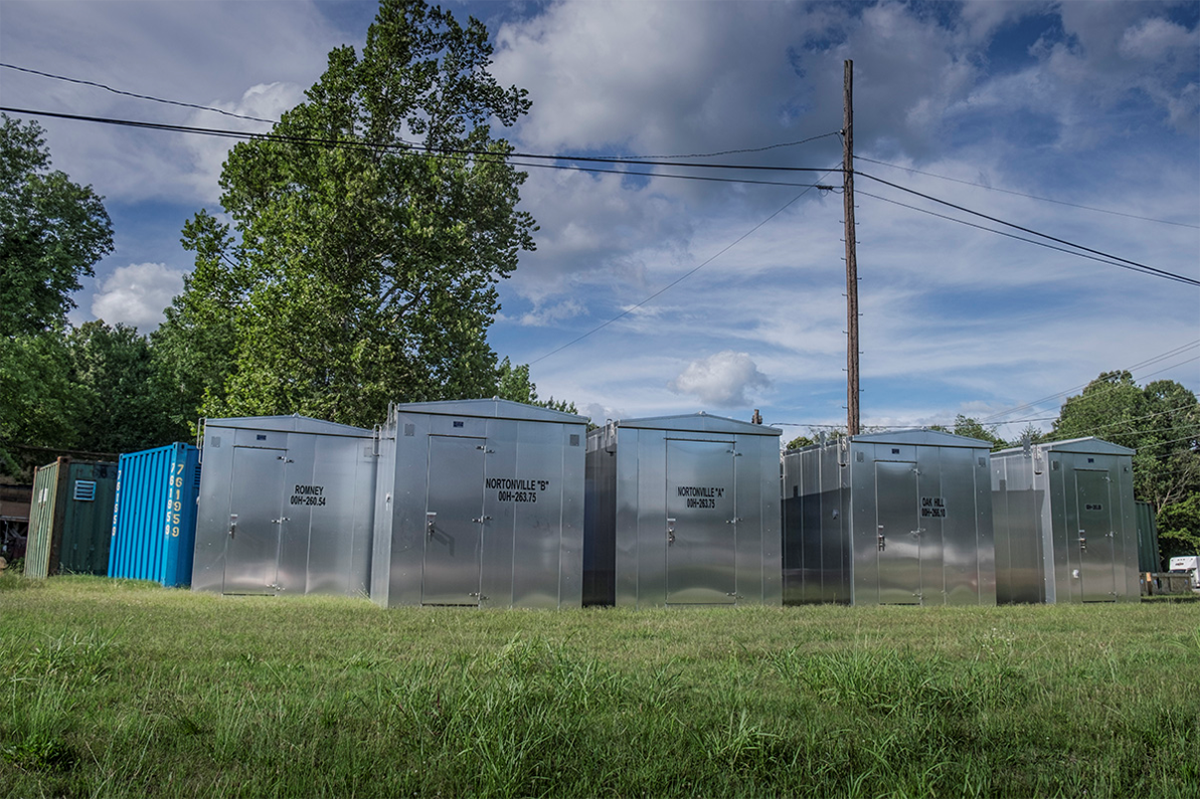
June 24, 2017 – Boxes for the new CSX double track main being built between the south end of Romney and the north end of Nortonville have arrived at Nortonville, Ky. The locations will be. Romney MP 260.54, Nortonville “B” MP 263.75, Nortonville “A” MP 263.75, Oak Hill (new location) MP 266.10 and a box at MP 265.10, on the Henderson Subdivision. Photo and caption by Jim Pearson
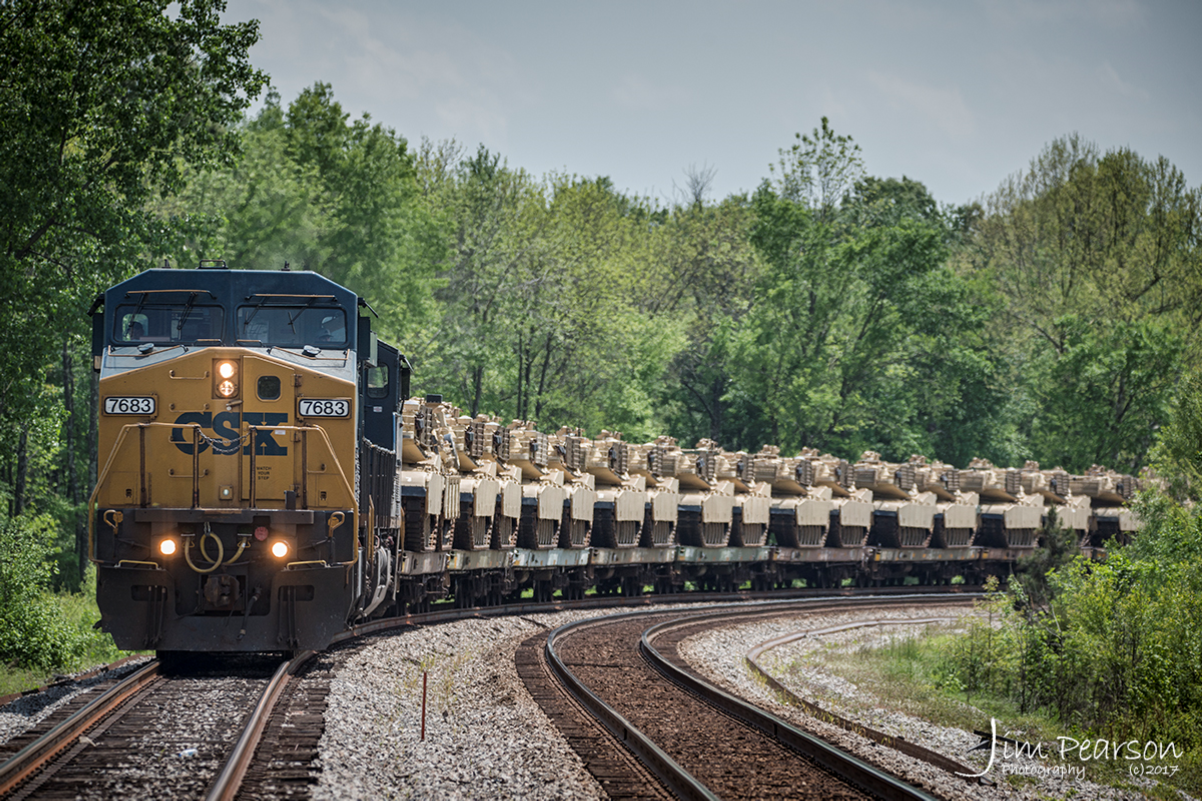
April 26, 2017 – CSX W869-21 pulls out of the North end of Romney Siding at Nortonville, Ky with a loaded military train and heads north on the Henderson Subdivision, with CSXT 7683 leading and 735 trailing. Jim Pearson Photography.
In this post, I’ll be talking about some of the many options available for shooting Time-lapse videos of railroads, or any subject matter.
Time-lapse photography is a technique whereby the frequency at which film frames are captured (the frame rate) is much lower than that used to view the sequence. When played at normal speed, time appears to be moving faster and thus lapsing. For example, an image of a scene may be captured once every second, then played back at 30 frames per second; the result is an apparent 30 times speed increase. Time-lapse photography can be considered the opposite of high speed photography or slow motion.
Processes that would normally appear subtle to the human eye, e.g. the motion of the sun and stars in the sky, become very pronounced. Time-lapse is the extreme version of the cinematography technique of undercranking, and can be confused with stop motion animation.
Here is my most recent time-lapse video of CSX crews changing out a bridge in Ft. Branch, Indiana.
I use a Nikon D800 full frame camera when shooting my time-lapses. While many cameras, including an iPhone, are capable of doing this, my post will center around how I do mine using my equipment. At the end of the post I’ll list some other options available and by no means will this post or list be all inclusive. The above video was shot using a Nikkor 18mm a f/8 at an interval of 1 second.
I like using the D800 for doing time-lapse because when it’s finished shooting the camera combines all the individual frames together in the camera and saves them as a video instead of individual JPG or RAW files. So far, I’ve only shot using JPG Fine because of file sizes and storage on my Compact Flash Card.
Plan Ahead – Think and plan ahead on how you’re going to do your time-lapse and pick a good subject that will have plenty of action! It’s not a good idea to arrive 5 minutes before the action starts! Also, if you’re going to have to shoot on private property then you’ll need to obtain permission first. If it’s from public access then it’s not as big a problem. Above all else when photographing around trains or other heavy equipment you need to always be aware of your surroundings, stay safe and never trespass!
Don’t Forget Anything – When shooting time-lapse you can spend several hours standing by the side of the road out in the boonies so it’s good to be prepared! Not to sound like your mom, but you should take enough water and food. If it’s winter or foul weather then spare socks, shoes, warm coat and gloves. In summer, more water, a hat and sunscreen are must haves! A fully charged cell phone and something to read will help pass the time as well. Of course, it goes without saying your camera and tripod and all the batteries you can carry for your camera.
Batteries – Shooting a time-lapse will drain your batteries quickly so always take spares! If you shoot in 1 second intervals then that’s 60 photos a minute. Multiply that by an hour (gives you 30 seconds of video at a frame rate of 30 FPS) and you’re shooting 3,600 photos an hour! If you only have two batteries then consider taking your battery charger along and charging your spare battery in the car. The key is to keep the camera shooting pictures and if you run out of juice then your time-lapse will suffer for it.
Tripod – You need a good sturdy tripod! If you only have a lightweight one then consider attaching a weight to the center pole in order to give it more stability. If the camera moves or shakes between exposure it can result in a shaky video. This is extremely important if your shutter speed is on the slow side because of the lower light levels, which can make for some interesting blur effects.
Exposure Mode – Whatever camera you use, set it to manual mode. Any other mode where the camera controls and changes the aperture or shutter speed, the camera will try to correct every change of light and color temperature, which can result in a flicker in your video. “Flicker” is known as the unwanted effect that occurs in the “time-lapse” due to slight differences in exposure between shots.
Focusing – I suggest turning off the autofocus and doing so manually instead. While the time-lapse is exposing it shouldn’t cause a problem as long as you don’t touch the shutter button on your camera, but it’s better to be safe than sorry. You can use autofocus to focus once you have your framing setup and then turn it off during your time-lapse sequence. Don’t forget to refocus when you change your camera position.
Shutter Speed – I tend to keep my shutter speed a bit high, but here again it all depends on the light and time of day. If you’re shooting late in the evening or at night then you may have to use a slower shutter speed. When doing so keep in mind that if you’re shooting at 1 second intervals that with a 10 second exposure (low light photography) it’s going to take more than 1 second interval to record your file to your card. You may have to adjust accordingly.
Aperture and Exposure – All lenses have a sweet spot (it’s sharpest point). I find that 2-3 stops from your widest aperture is the best. If shooting with a f/2.8 lens then that would be at f/8. Be sure to watch your exposure throughout the day and make sure it’s consistent. The sun move and exposure changes so to make sure it’s even throughout check it every time you change the camera’s position or at least once an hour, is my rule of thumb.
Lens – This all depends on your preference. Sometimes I’ll use a 24-70 so I have the option to zoom in on different aspects of the scene without changing lenses. On the time-lapse above I used a 18mm at f/8.
Time Lapse Duration – I personally prefer having the camera shoot a photo in the 1-2 frames a second range. The CSX bridge change video was shot at 1 second intervals.
To make your time-lapse a bit more interesting visually it’s best to stop the time-lapse and re-position the camera every so often to help give more visual impact.
A good app and the one I use to figure out my interval is called PhotoPhills. It runs $9.99 in the app store, but is well worth it and does a lot more than the time-lapse calculations. Their website is: http://www.photopills.com/
The app will help you figure out how often you need to expose, how long and how much room you’ll need on your card to store all the information that you capture. If your camera doesn’t combine everything together in the end to make your video your card may require a lot of space to store the thousands of JPGs or RAW files. Here’s a link to an online version of their Timelapse Calculator you can use for free.( http://www.photopills.com/calculators/timelapse)
If your camera doesn’t combine your JPGs or RAW files then you’ll need to look for a program to combine all the resulting files into a video clip that you can edit. There are several programs available to do this, some of which are listed below.
One of the most popular is LRTimelapse (https://lrtimelapse.com/). A few others are: GBTimelapse, Time-Lapse Tool and Panolapse. There is many more and to find them just do a Google search.
Here’s a good article on how to shoot time-lapse using your iPhone or iPad. There’s many other apps for doing this with your smart device. Just search your phone’s app store. How to Take Amazing iPhone Time Lapse Videos (https://iphonephotographyschool.com/iphone-time-lapse/) To give my time-lapse the polished look complete with titles and transitions I use Adobe Premiere Pro CC, the online version. It’s available for a subscription fee of $19.99 a month. There’s many other programs available to edit video however and most all do a good job
There is so much more to shooting time-lapse, but I hope this post will at least give you a good starting point and food for thought!
Here’s another time-lapse I did on replacing a switch at Mortons Gap, Ky.
This month’s photography column will be all about the equipment and software for capturing trackside videos using your smartphone.
From a composition standpoint video photography of trains is pretty much the same as regular still photography except of course you capture motion and can put together sequences and titles to help tell the story.
Turning your phone horizontally (to landscape mode) is the best way to record all your smartphone videos. Period! It’s much easier to handle the phone this way and you won’t see those annoying black side bars when watching your video on a large screen. Also, don’t forget that your TV and Computer Monitors sit horizontally and not vertical.
Plus, everything looks much beautiful recorded in horizontal (more room for your subject) vs. an ugly compress square. This format might be okay for Instagram photos, but not for videos.
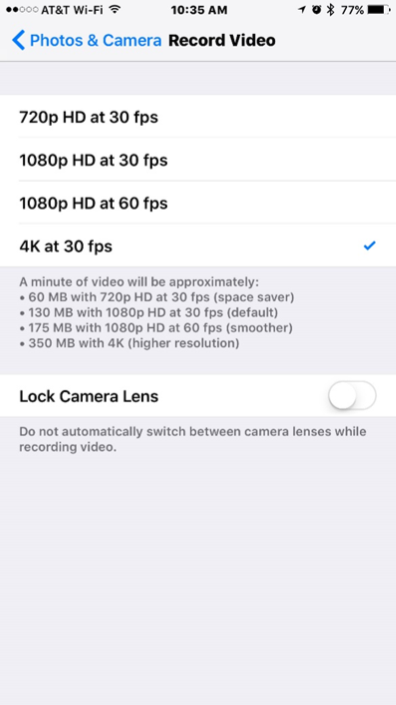
Depending on which smartphone you have will determine the quality of your video. The newer iPhones come with 4K video resolution (a far cry from the VHS days!), which is about as high a quality you can get these days. However, you need to make sure it’s set to record in the highest quality by paying a visit to the settings on your device. Be aware, the higher the quality of your video the larger your video file is and the more space it will take. Also, it will take longer to upload if you posting it online.
Below are screen grabs where you can set your video quality on the iPhone. Not sure where it is on other smartphones, but should be somewhere under your settings.
One sure sign of an amateur video recording (besides a video done with low lighting) is a shaky video. So, stop holding your iPhone and mount it on a stand. Working with a mounted iPhone will also prevent your shot from going out of focus.
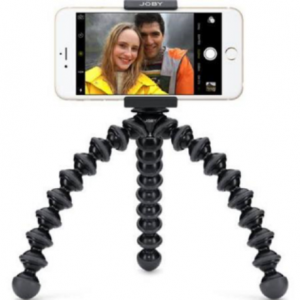
One mount for the iPhone and other smartphones is the GripTight GorillaPod stand made by Joby. This flexible iPhone mount is an ideal accessory for all videographers on-the-go.
The stand is compact, doesn’t take up too much room and holds the phone safely and securely and can also be attached to poles and tree limbs. The GripTight mount can also be attached to most other tripods via a universal ¼” screw.
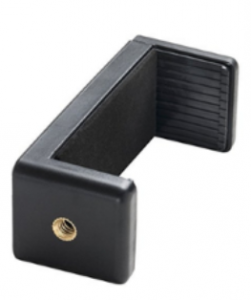
I personally use a regular tripod for my video work and attach my camera using the device below. It runs $8.99 on Amazon Prime. Click on the photo for a link. There’s many others available however if you just do a search.
If you don’t have a tripod, one stabilization trick is bracing yourself against something such as a light pole or tree. Another is to bring your elbows in tight against your body, which will give you more stability. Holding your breath during shots can also help minimize shakiness if you are hand-holding the phone on a solid surface.
While editing your video on the smartphone can be done, if you’re going to be serious about your video work it’s best to do it on a desktop computer. The controls are much easier to use. There are many programs out there that allow you to do this and one’s probably already installed on your Windows computer called Movie Maker. Many others are available as well on the market. My favorite is Adobe Premiere Pro. It’s a monthly subscription software that runs about $20 a month. I do a lot of video work for my church however and so I go with this heavy-duty software. Do a Goggle search and you’ll find all kinds of software, some free and some paid.
As for editing on the smartphone itself? I use an app called Cameo a lot, but I also use MoviePro, Pinnacle Studio Pro and iMovie. Easiest way to learn to use these programs is to shoot some video and play around with them. You can also search on YouTube for the app and find tutorials there as well. Other apps that get top reviews are, Videoshop, Splice, Quik and Video Crop. There are many others however.
Many of the above apps will also allow you to shoot video instead of using the built-in camera. These apps and others such as Filmic Pro allow you to have much more control over the shooting of your videos.
If you plan on doing a lot of long videos, then I recommend getting a battery pack for whatever kind of smartphone you have. Video recording will eat the battery on your phone quick.
Also, in closing, I recommend that you don’t zoom! Most smartphones use digital zoom and the quality of your video will suffer greatly if it does. If your phone has optical zoom or you have add on lenses for your phone, then they should be fine. Digital zoom only enlarges the pixels on your phone and lowers the quality of the video and photo.
Hope this hasn’t left your head spinning too much. If you have questions, please feel free to drop me an email at jim@jimpearsonphotography.com
Below are the dates for this year’s chapter photo contest. During the weeks listed all members are invited to shoot pictures and submit no more than two entries each to webmaster@westkentuckynrhs.org by the deadline listed next to each contest. You must be a paid member of the chapter to participate in these contests.
Jim Pearson will judge the photos and select 1st through 3rd place and the winners will be presented in the PennyRail and on the chapter website. We’ll also view them at the meeting following each contest.
At least the 1st place winners will be used to produce a chapter calendar for the next year.
All submissions must have a caption that lists at least the railroad, location and date with photographers credit and any other relevant information.
Week of Feb 6 – 12, 2017 Submission Deadline: Feb 14, 2017
Week of May 1 – 7, 2017 Submission Deadline: May 11, 2017
Week of July 31 – Aug 6, 2017 Submission Deadline: Aug 10, 2017
Week of Oct 30 – Nov 5, 2017 Submission Deadline: Nov 9. 2017
Jim will be back after the first of the new year with more helpful information about rail photography. For now, enjoy a few more examples of his work below.
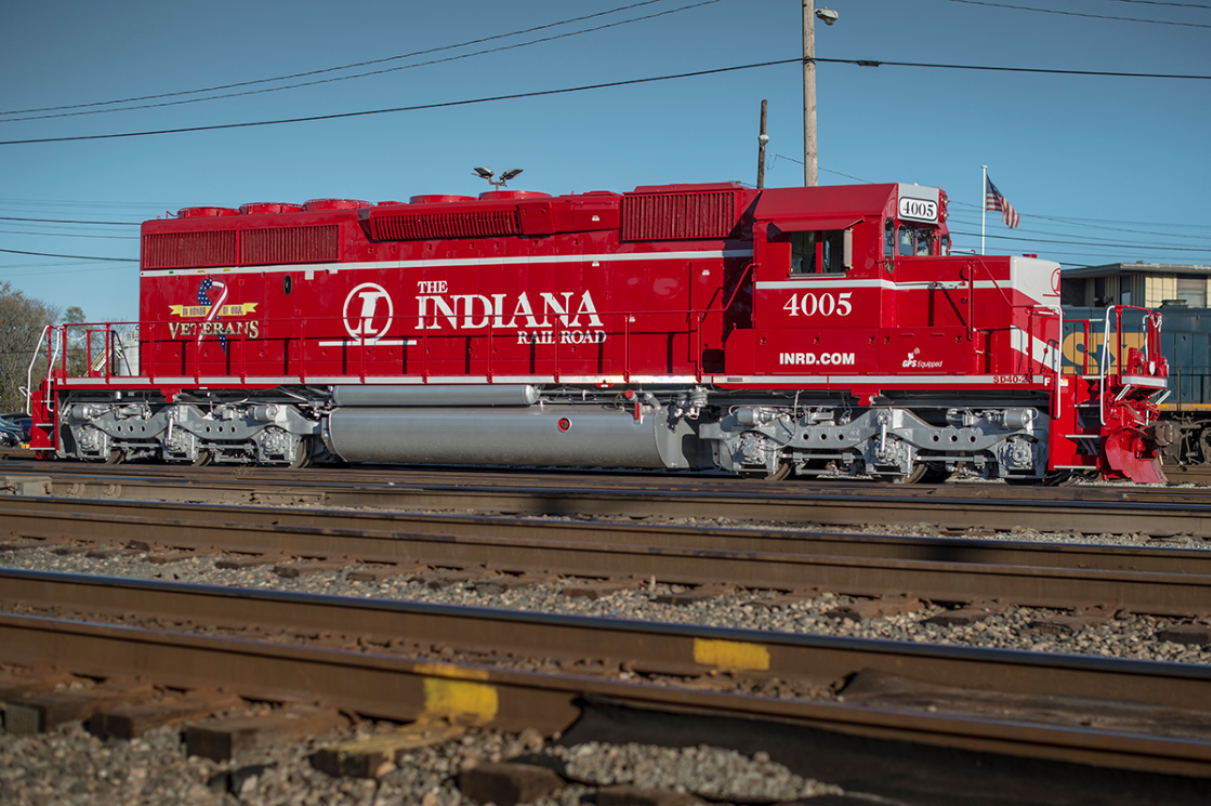
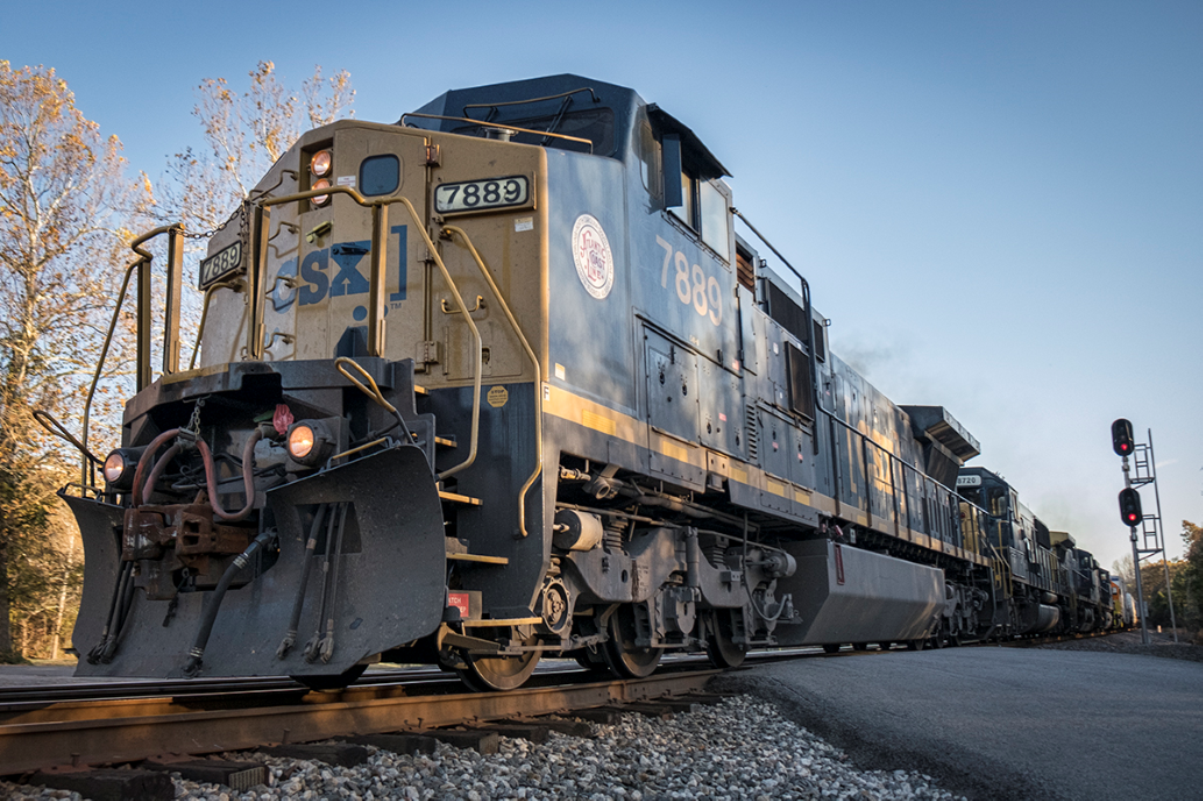
November 12, 2016 – Indiana Railroad’s newly painted “In Honor of Our Veterans” engine 4005 (SD40-2), sits at the north end of CSX’s Howell Yard in Evansville, Indiana. The unit was freshly painted at the National Railway Equipment Co. shops in Mt. Vernon, Illinois and is waiting to move on north along CSX’s CE&D Subdivision for delivery to the Indiana Railroad. – Photo by Jim PearsonNovember 16, 2016 – A CSX L688 passes the south end of the siding at Slaughters, Ky with Atlantic Coast Line engine 7889 leading it’s 11,500ft train, as it heads north on the Henderson Subdivision. – Photo by Jim PearsonNovember 16, 2016 – Huron and Eastern Railway 2026 (GP38-3) brings up the rear of the power lash up on CSX L688 as it passes the south end of the siding at Slaughters, Ky with a 11,500ft train, as it heads north on the Henderson Subdivision. Huron and Eastern Railway is a short line railroad operating 384 miles of track in The Thumb and Flint/Tri-Cities area of the lower peninsula of Michigan. – Photo by Jim Pearson
This month we’re going to take a look at the free, yes I said free, app for editing your photos on iPhone, Android, Mac and the PC. The app was originally developed by NIK Software, but has since been bought out by Google, which distributes it. You can find it available in the app store or by searching on Google.
This is my go to app for editing pictures that I shoot on my iPhone 6s when I’m out trackside or anywhere else taking photos. It’s super easy to use and there’s tutorials available all over the web. I’ll provide links to some at the end of this column. Also, I’ll provide a brief overview for you in this column.
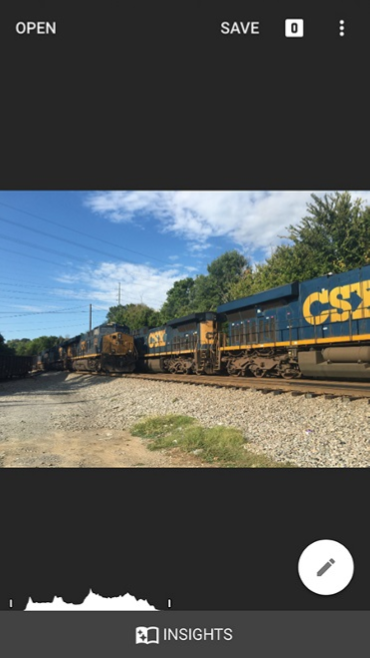
When you first open Snapseed you’ll get the opening screen which prompts you to select and open the image you want to work with. You have several options. You can choose a photo from your camera roll, or whatever your device calls it, take a photo with the camera, open your latest image or paste in a copied image.
Once the image is open you’ll notice several options at the top of your screen which are Open, which opens a new image, Save, which gives you several options which include, save, save a copy and cancel. I use the Save a copy option as it allows you to go back and made changes to what you’ve done to the photo in Snapseed. It also preserves your original photo. Next to the Save feature is a small white square that will contain numbers as you apply different effects to your photos. These edits, called stacks or layers, allow you to revisit something you’ve done to the photo and change or delete the edit.
To the right of the small white square are three white dots. Tap this to access other options including, Undo, Revert, Share, Help and Cancel.
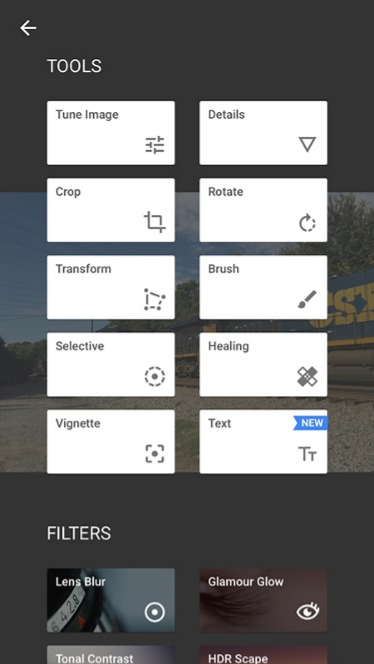
After you’ve opened your image you’ll notice a large round dot with a pencil in it in the lower right of the screen. Tap this to bring up your tools for editing. They’re pretty intuitive and easy to figure out. Under TOOLs you’ve find Tune Image, which allows you to adjust everything from brightness to shadows. Once you selected it just press and hold down on the screen to bring up a menu to change between the different options. Once you’ve selected an option slide you finger back and forth across the screen to change the effect. This procedure is the same in all the features you’ll encounter in Snapseed. To apply your changes just click on the checkmark on the bottom of the screen. If you want to see your histogram click on the small icon on the left of the screen.
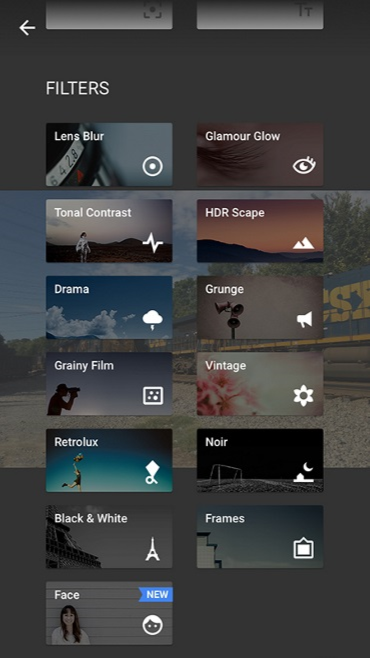
Also under the tools screen you’ll find FILTERS (left). These allow you to apply creative effects to your photos such as Lens Blur, HDR Scape, Black and White along with many more. It also has an option for adding frames to your image as well. Playing around with them is the easiest way to figure out what each one does. If you decide you don’t like an effect just click on the small x on the screen at the bottom left where you’re editing and cancel the edit.
If you want to zoom into your photo during an edit, just pinch in or out and use the navigation box by using the blue box that appears in the lower left corner.
Once you’ve edited your picture to look the way you’d like just click on the save button in the upper right corner and choose the option you wish to use. As I said before, I highly recommend the Save a copy option.
Also, for help, there’s a button at the bottom of the screen that says “Insights.” Click on it to bring up tutorials and videos on how to use Snapseed.
This is a larger reprint of a shot used in Jim Pearson’s photography column last month. I thought it deserved another and larger look. – Bill Thomas, Editor
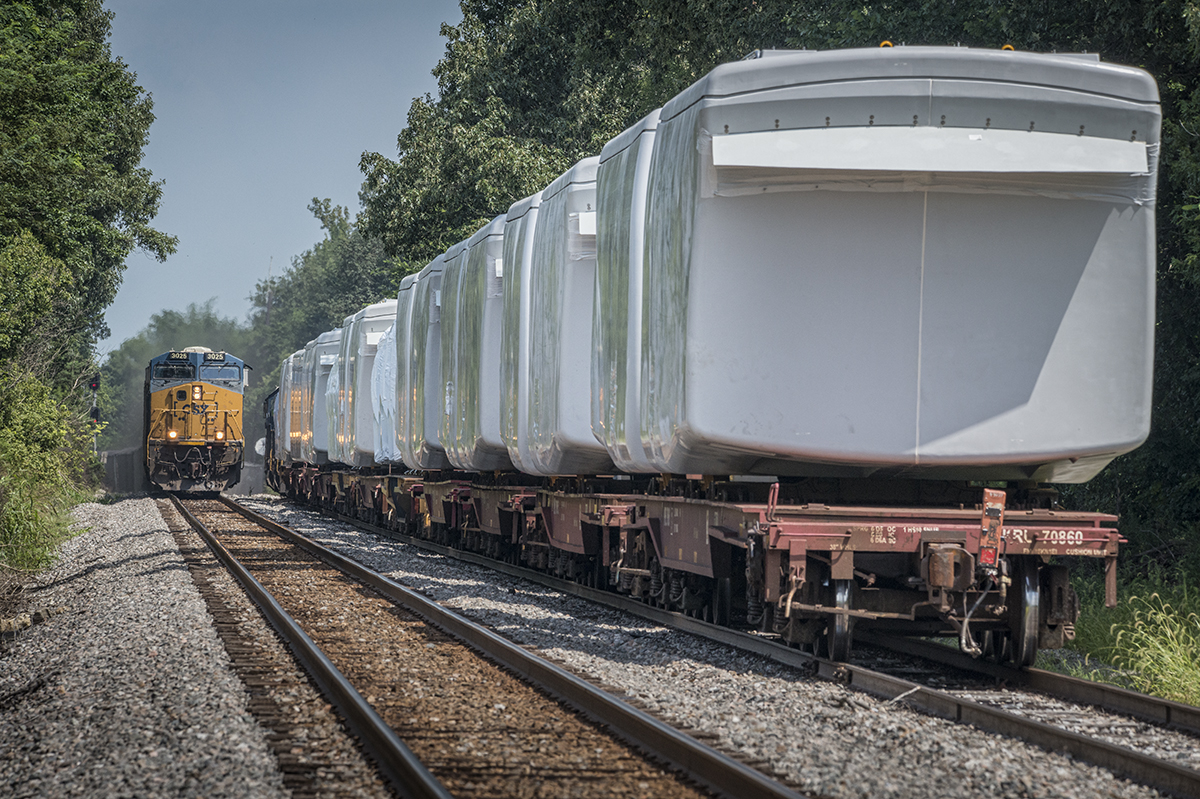
August 5, 2016 – Southbound CSX loaded coal train N320 (Evansville, IN (EVWR) – Cross, SC) meets W987-30 with a load of windmill motors waiting to go north from the north end of Hanson siding as N320 makes it’s way south on the Henderson Subdivision at Hanson, Ky. – Tech Info: 1/640 | f/13 | ISO 720 | Lens: Sigma 150-600 @ 290mm with a Nikon D800 shot and processed in RAW.
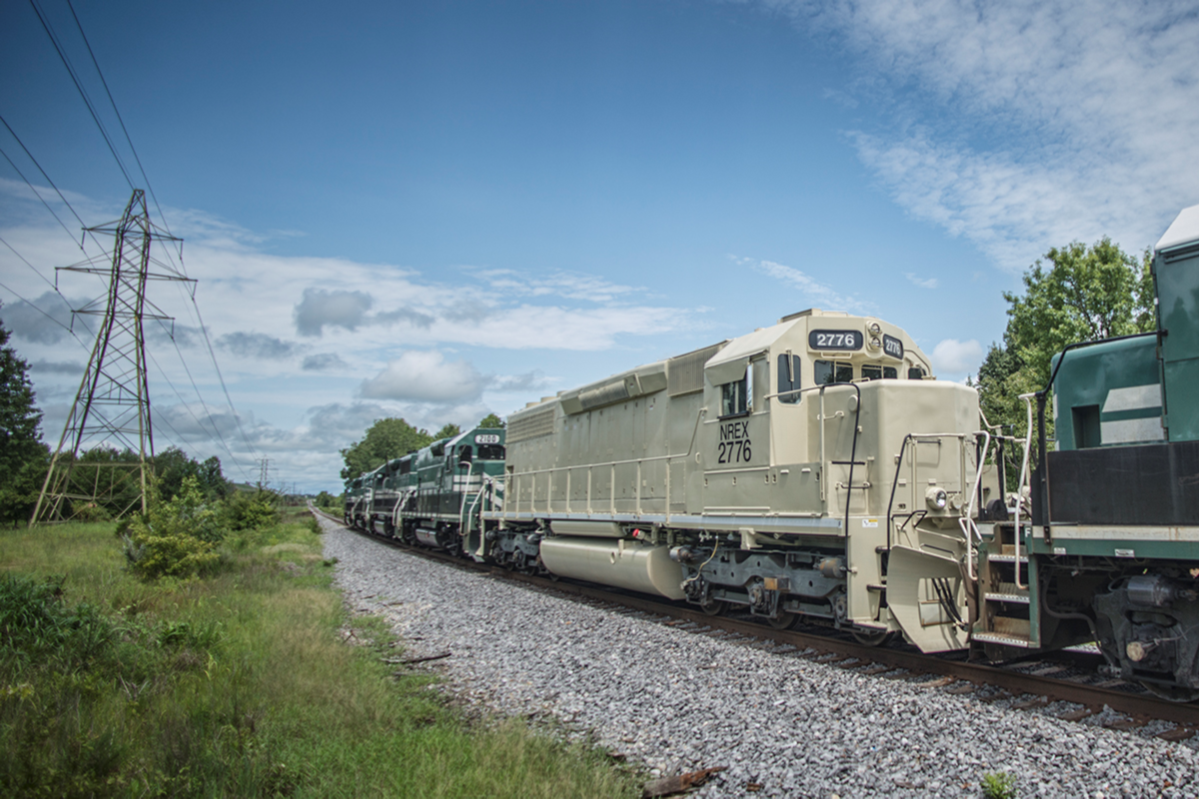
July 28, 2016 – A Paducah and Louisville Railway coal train makes its way up the Warrior Coal lead, with NREX 2776 as its 5th unit, as it heads for a load of coal at their loadout at Madisonville, Ky. This engine is still running back and forth from Warrior to Calvert City as of August 8th. – Photo by Jim Pearson
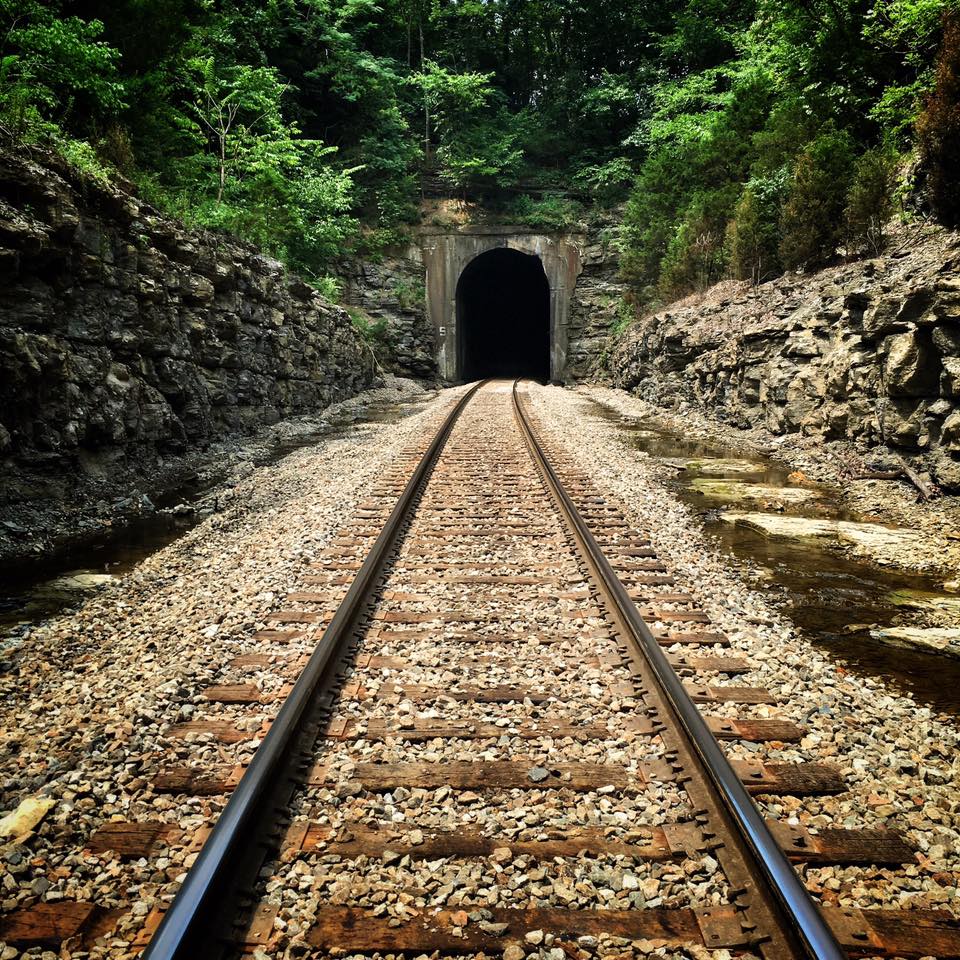
On July 22, 2016 I made a trip to find the South Tunnel on CSX’s Mainline Subdivision. I didn’t catch a train unfortunately, but this shot taken with my iPhone 6s really doesn’t need one! Look for photos that can provide you with good leading lines to help draw your subject into your picture!
Welcome to my first installment on this new column for the Pennyrail! I hope that everyone gets at least something from my ramblings here!
The Best Camera I’m often asked what’s the best camera to use when taking photographs? My short answer is, the one you have with you! It doesn’t really matter what brand you use or like as long as you get out trackside and shoot pictures!
Now, of course some cameras offer better results than perhaps others, but what it all comes down to is that it’s the person behind the camera that “makes” the picture, not the equipment you use! I shoot and have seen others shoot with everything from smartphones to high priced digital cameras, but what it really comes down to a lot is you, the photographer and how you see and capture the scene before you! That’s what I love about photography, the ability to decide when and what I want to photograph. No one else tells me, or you, when to press the shutter.
August 5, 2016 – Southbound CSX loaded coal train N320 (Evansville, IN (EVWR) – Cross, SC) meets W987-30 with a load of windmill motors waiting to go north from the north end of Hanson siding as N320 makes it’s way south on the Henderson Subdivision at Hanson, Ky. – Tech Info: 1/640 | f/13 | ISO 720 | Lens: Sigma 150-600 @ 290mm with a Nikon D800 shot and processed in RAW.
Simple advice to keep in mind when shooting pictures. First and foremost, if something in your picture doesn’t contribute to what you want the final photo to say then eliminate it when your shooting. Do this by getting closer, lower, higher, picking up trash or whatever else it takes. It’s much easier to do it before you shoot than it is to have to do it in the computer. Second, when shooting trains, don’t get hung up on the direction of the light! It is what it is and you can’t always control it. You have to shoot the picture when the train and you are there! Third, don’t shoot everything from eye level! Get low sometime to add drama to your pictures, or high sometimes to give a different perspective. Fourth, don’t shoot just on bright and sunny days. Great pictures are to be made on cloudy, rainy, snowy filled days.
Fifth, don’t put the camera away when it gets dark! Drag out the tripod or fast lens and shoot! There’s great pictures to be made during twilight and after dark. Sixth, Study the pictures of photographers you like! Ask yourself questions such as why did he shoot form this angle, time of day, etc. Seventh, look for things to photograph that are different. Heritage Locomotives, Steam Engines, Unusual paint schemes, obscure out of the way short lines, trains with different types of cargo, etc. I hope some of these help and good luck trackside and always be safe! Keep Clicking!!!
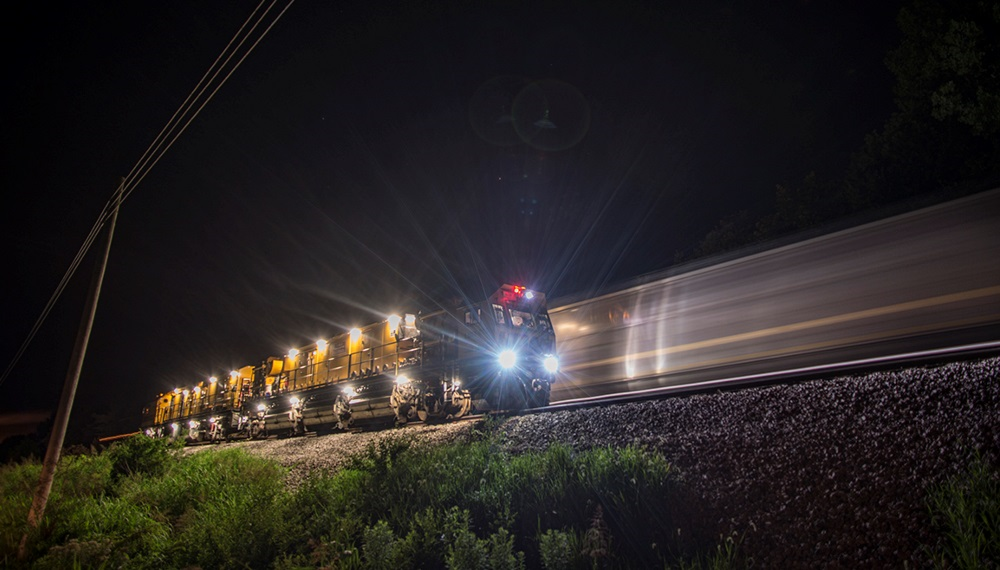
Ed. One more by Jim Pearson – can’t help but think about O. Winston Link seeing this. July 9, 2016 – LORAM Rail grinder RGS-9 waits in the siding at the north end of Robards, Ky as southbound loaded coal train CSX N040-05 passes it on CSX’s Henderson Subdivision. – Tech Info: 3 seconds | f/2.8 | ISO 125 | Lens: Nikon 18mm with a Nikon D800 shot and processed in RAW. – Photo by Jim Pearson (forgive me for cropping)
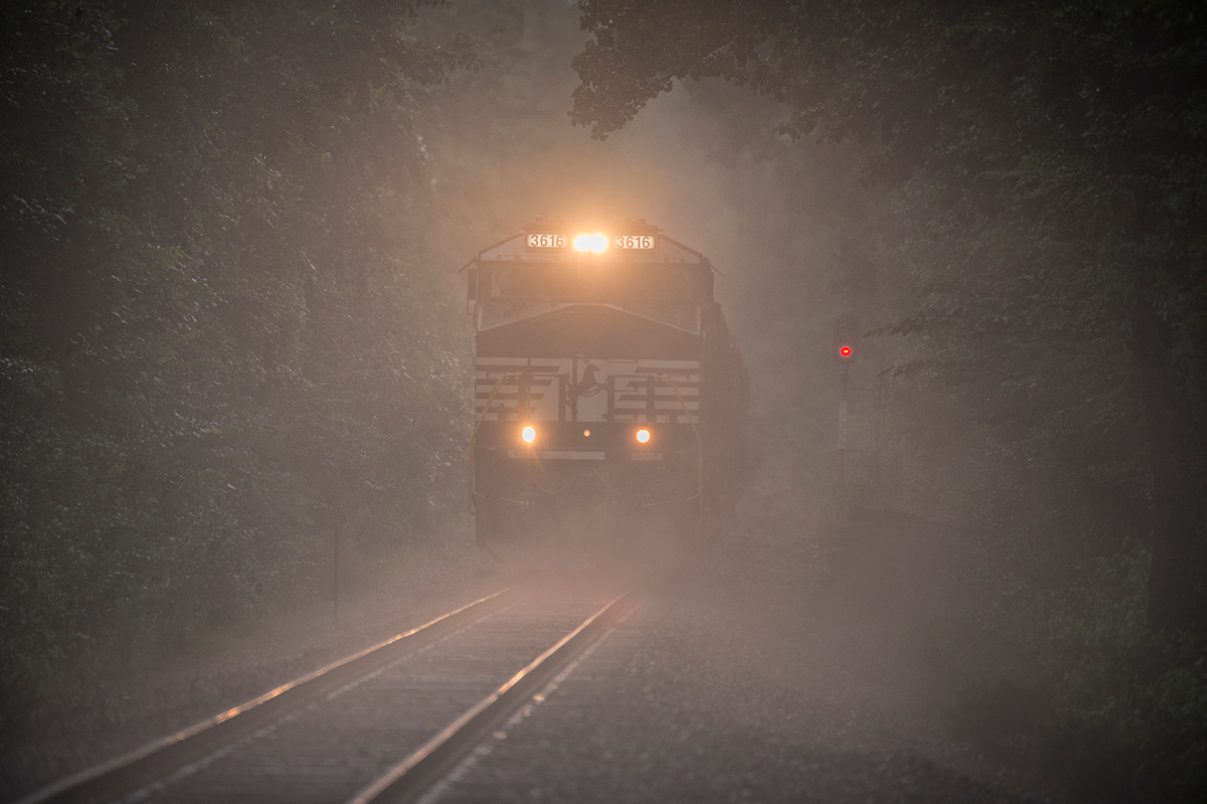
July 6, 2016 – Norfolk Southern Tier4 engine 3616 heads up a loaded coal train as it heads north on the Paducah and Louisville Railway cutting its way through steam rising from the roadbed after a summer rain outside Bremen, Ky. – Tech Info: 1/320 | f/6.3 | ISO 500 | Lens: Sigma 150-600 @ 600mm with a Nikon D800 shot and processed in RAW. – Photo by Jim Pearson
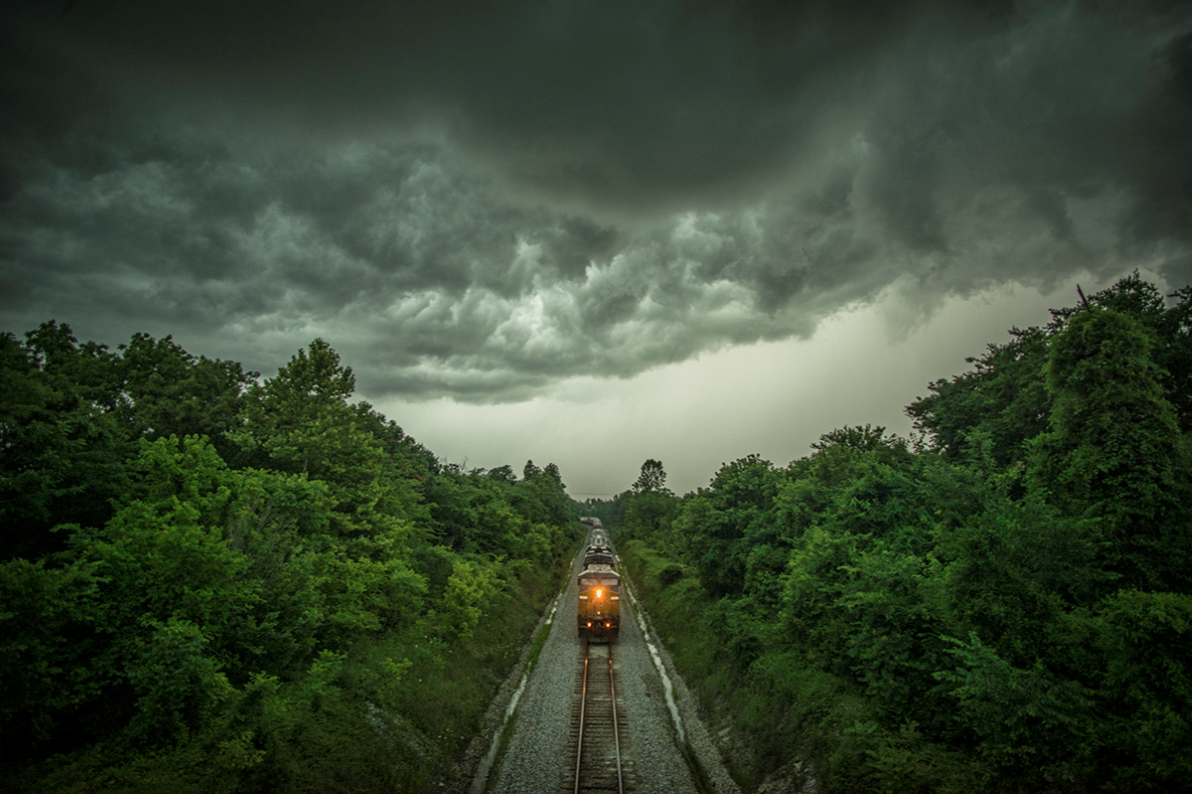
June 15, 2016 – I chased the leading edge of this storm front for about 20 miles till I finally caught CSX Q592-15 approaching the south end of the siding at Kelly, Ky as it headed north on the Henderson Subdivision. As dark and nasty as the sky looked, all it did was dump a lot of rain and create some lighting and fortunately for me it didn’t do it while I was shooting! – Tech Info: 1/400 | f/2.8 | ISO 900 | Lens: Nikon 18mm with a Nikon D800 shot and processed in RAW. – Photo by Jim Pearson
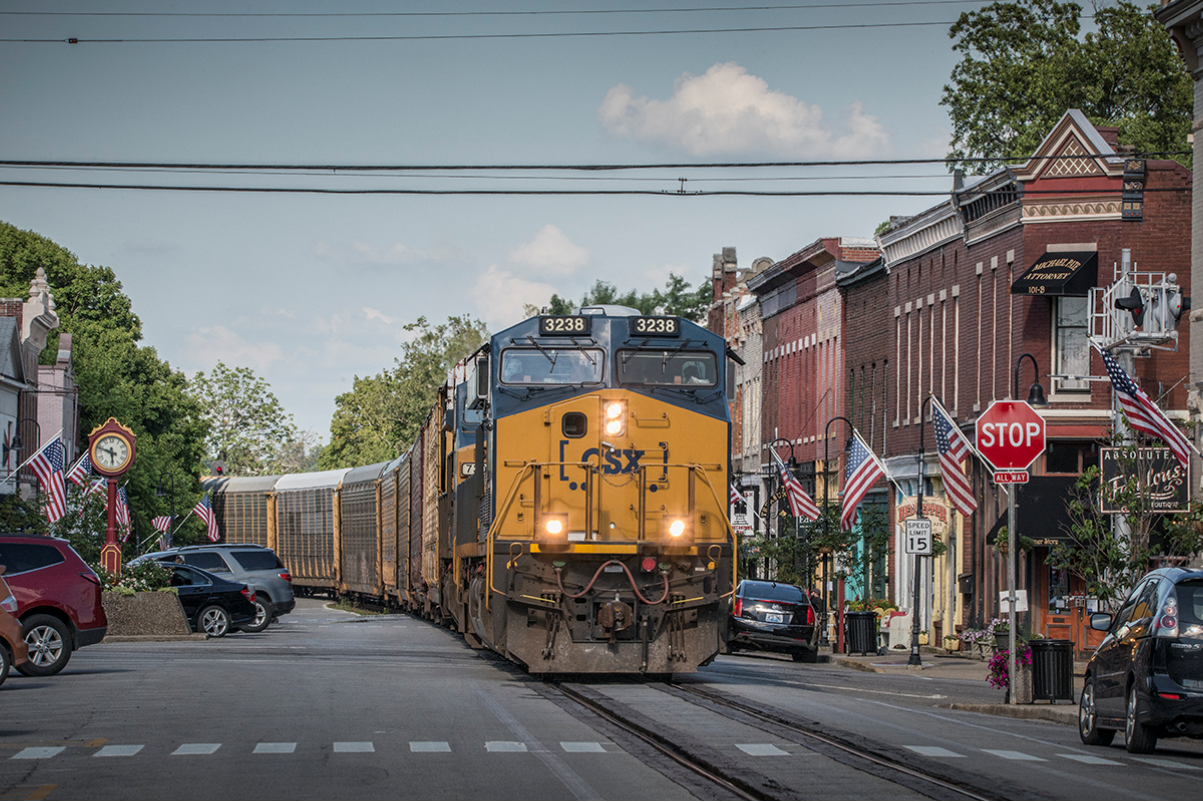
July 1, 2016 – Autorack CSX Q241-30 (Detroit, MI – Louisville, KY) makes its way through downtown La Grange, Ky (one of the few places in the state that has street running) as it heads south to Louisville, Ky on the Short Line (LCL Subdivision). – Tech Info: 1/400 | f/20 | ISO 900 | Lens: Sigma 150-600 @ 165mm with a Nikon D800 shot and processed in RAW. – Photo by Jim Pearson
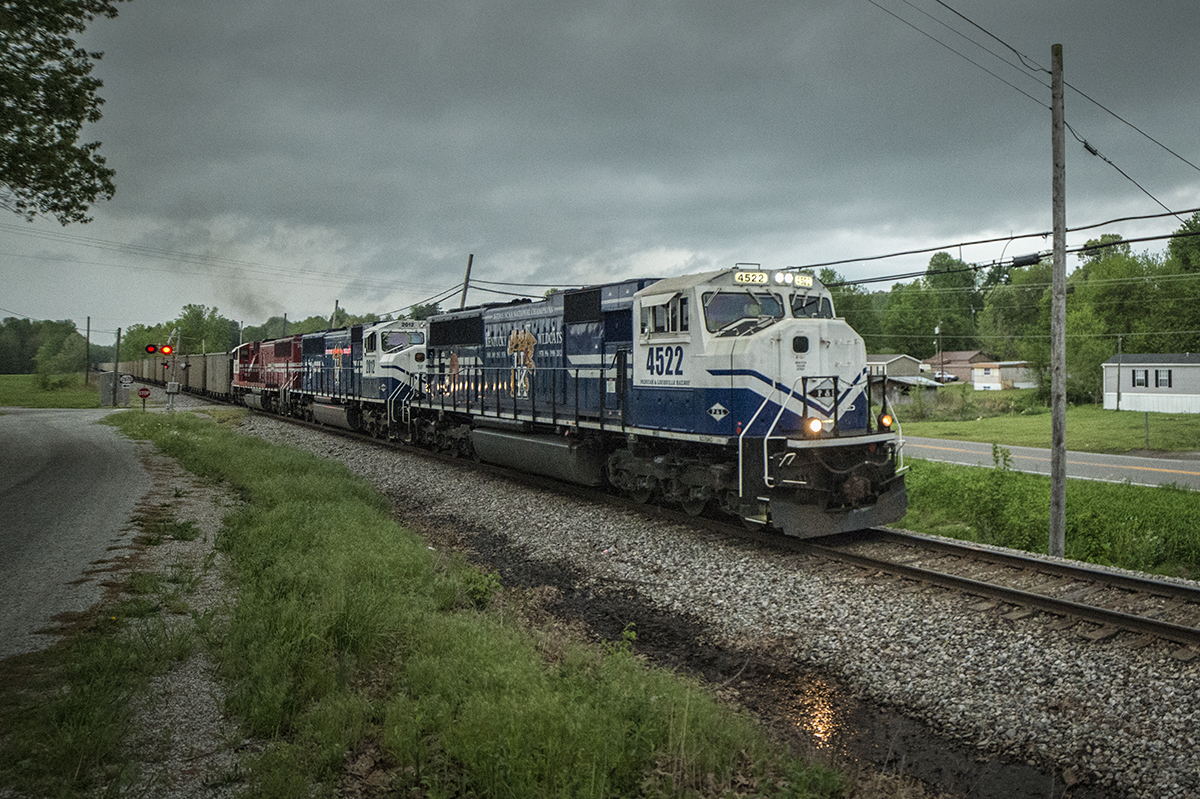
April 27, 2016 – Paducah & Louisville Railway WW1, (Louisville Gas & Electric) chases a heavy storm north with a loaded coal train at McHenry, Ky with PAL UK engines 4522 and 2012 along with UofL 2013 as power. – Tech Info: 1/400 | f/2.8 | ISO 3600 | Lens: Rokinon 14mm on a Nikon D800 shot and processed in RAW. – Photo by Jim PearsonMay 10, 2016 – A Paducah & Louisville Railway DPU coal train rounds the loop at the Calvert City Loadout at Calvert City, Kentucky as storm clouds pass in the distance. I think this is the first time I can recall finding a PAL train with DPU units. It had four on the front and four on the rear of the train as it moved through the loop. – Tech Info: 1/1250 | f/5 | ISO 560 | Lens: Sigma 24-70 @ 48mm on a Nikon D800 shot and processed in RAW. – Photo by Jim Pearson
 This month’s photography column will be all about the equipment and software for capturing trackside videos using your smartphone.
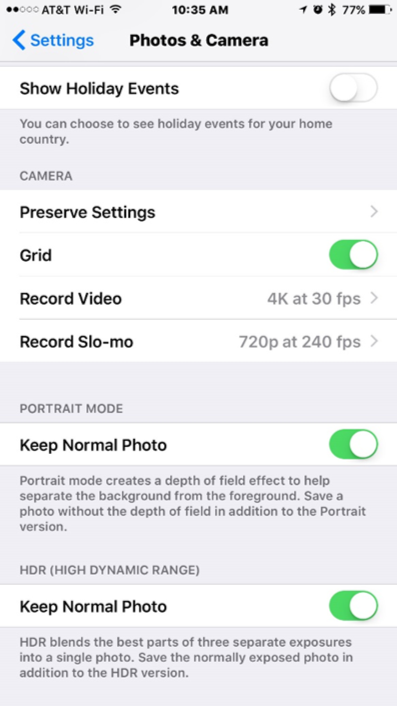
 One mount for the iPhone and other smartphones is the GripTight GorillaPod stand made by Joby. This flexible iPhone mount is an ideal accessory for all videographers on-the-go.