
 This month we’re going to take a look at the free, yes I said free, app for editing your photos on iPhone, Android, Mac and the PC. The app was originally developed by NIK Software, but has since been bought out by Google, which distributes it. You can find it available in the app store or by searching on Google.
This is my go to app for editing pictures that I shoot on my iPhone 6s when I’m out trackside or anywhere else taking photos. It’s super easy to use and there’s tutorials available all over the web. I’ll provide links to some at the end of this column. Also, I’ll provide a brief overview for you in this column.
When you first open Snapseed you’ll get the opening screen which prompts you to select and open the image you want to work with. You have several options. You can choose a photo from your camera roll, or whatever your device calls it, take a photo with the camera, open your latest image or paste in a copied image.
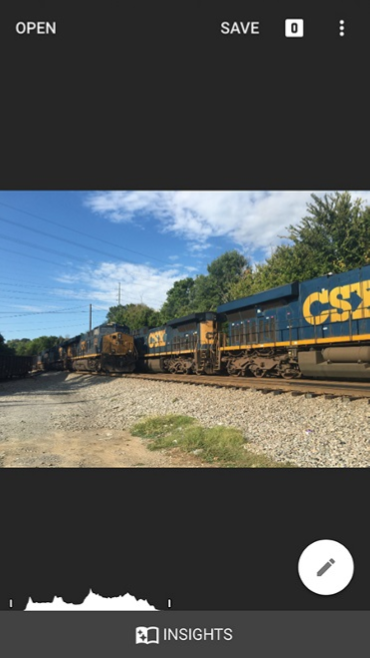 Once the image is open you’ll notice several options at the top of your screen which are Open, which opens a new image, Save, which gives you several options which include, save, save a copy and cancel. I use the Save a copy option as it allows you to go back and made changes to what you’ve done to the photo in Snapseed. It also preserves your original photo. Next to the Save feature is a small white square that will contain numbers as you apply different effects to your photos. These edits, called stacks or layers, allow you to revisit something you’ve done to the photo and change or delete the edit.
To the right of the small white square are three white dots. Tap this to access other options including, Undo, Revert, Share, Help and Cancel.
After you’ve opened your image you’ll notice a large round dot with a pencil in it in the lower right of the screen. Tap this to bring up your tools for editing. 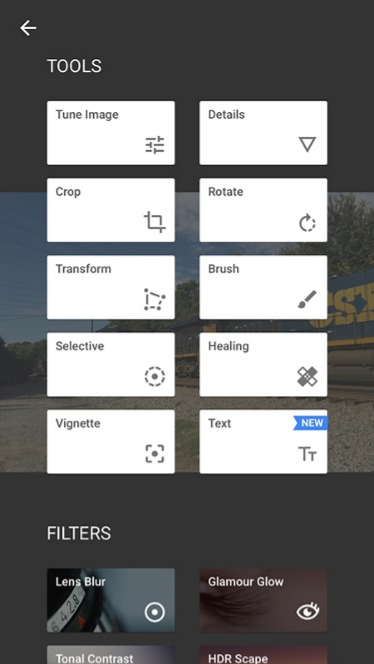 They’re pretty intuitive and easy to figure out. Under TOOLs you’ve find Tune Image, which allows you to adjust everything from brightness to shadows. Once you selected it just press and hold down on the screen to bring up a menu to change between the different options. Once you’ve selected an option slide you finger back and forth across the screen to change the effect. This procedure is the same in all the features you’ll encounter in Snapseed. To apply your changes just click on the checkmark on the bottom of the screen. If you want to see your histogram click on the small icon on the left of the screen.
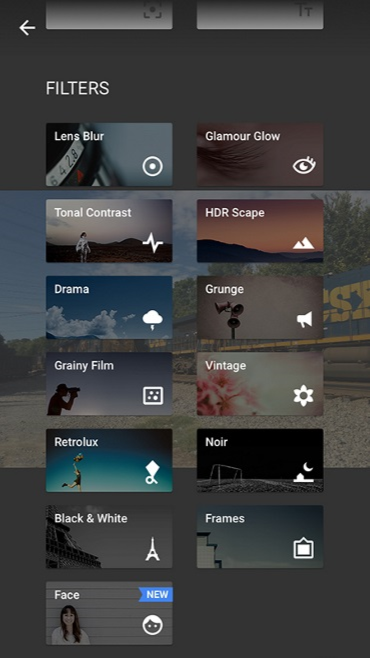 Also under the tools screen you’ll find FILTERS (left). These allow you to apply creative effects to your photos such as Lens Blur, HDR Scape, Black and White along with many more. It also has an option for adding frames to your image as well. Playing around with them is the easiest way to figure out what each one does. If you decide you don’t like an effect just click on the small x on the screen at the bottom left where you’re editing and cancel the edit.
If you want to zoom into your photo during an edit, just pinch in or out and use the navigation box by using the blue box that appears in the lower left corner.
Once you’ve edited your picture to look the way you’d like just click on the save button in the upper right corner and choose the option you wish to use. As I said before, I highly recommend the Save a copy option.
Also, for help, there’s a button at the bottom of the screen that says “Insights.” Click on it to bring up tutorials and videos on how to use Snapseed.
Other good resources are:
¨ Snapseed on YouTube: https://www.youtube.com/channel/UCqTgGRgp5CRHhUJKeRraQgw/How to use Snapseed
¨ http://www.mobiography.net/apps/how-to-use-snapseed-to-enhance-your-mobile-photography/
¨ Google Support: https://support.google.com/snapseed/
¨ Download in from the App Store for your device or by search for Snapseed Download on Google.com